Linux Help Desk

Linux Help Desk

Saturday, October 24, 2015

How To Install Apache Tomcat 7 in CentOS 6

To install Apache Tomcat on CentOS, make sure you have the latest version of java installed on your system. Otherwise just download the Java RPM or BIN from the following link:
http://www.oracle.com/technetwork/java/javase/downloads/jdk-6u25-download-346242.html

Mininumun JDK 6 is required to install Apache Tomcat 7

Check which version of java is installed by default, on your system 
[root@server ~] # java -version

Create a directory java under /usr
[root@server ~] # mkdir /usr/java

Go to the download location where you downloaded the JDK file.
[root@server ~] # cd Downloads 

[root@server Downloads] # cp jdk-6u25-linux-i586-rpm.bin /usr/java

[root@server Downloads] # cd /usr/java

[root@server java] # chmod 775 jdk-6u25-linux-i586-rpm.bin 

[root@server java] # ./jdk-6u25-linux-i586-rpm.bin

It will self extract and install java on your system.

Now check the java version 
[root@server java] # java -version

If it still remains the same then execute the following
[root@server java] # ln -sf /usr/java/jdk1.6.0_25/bin/java   /usr/bin/java 
(Here s is for softlink, f is forcefully)

Now verify the java version, it should now point out to the new version.

Create a Tomcat system user account responsible for running tomcat as running it with root is not a good practice and it will create a entry to break into the system. 
[root@server java] # useradd -r tomcat

Download the tomcat package from the apache tomcat website using the following link
http://apache.petsads.us/tomcat/tomcat-7/v7.0.40/bin/apache-tomcat-7.0.40.tar.gz

After downloading the package copy the package to the /usr/local directory.
[root@server java] # cd /root/Downloads

[root@server Downloads] # cp apache-tomcat-7.0.40.tar.gz  /usr/local

[root@server Downloads] # cd /usr/local

[root@server local] # tar -xvzf apache-tomcat-7.0.40.tar.gz

[root@server local] # mv apache-tomcat-7.0.40 apache-tomcat7

[root@server local] # chown -R tomcat.tomcat apache-tomcat7

Making the Tomcat script.
[root@server ~] # vim /etc/init.d/tomcat

#!/bin/bash
#
# tomcat       Starts Tomcat Java server.
#
#
# chkconfig: 345 88 12
# description: Tomcat is the server for
# Java servlet applications.
### BEGIN INIT INFO
# Provides: $tomcat
### END INIT INFO

JAVA_HOME=
/usr/java/jdk1.6.0_25
 export JAVA_HOME 
PATH=$JAVA_HOME/bin:$PATH 
export PATH 
TOMCAT_HOME=/usr/local/apache-tomcat7
START_TOMCAT=/usr/local/tomcat7/bin/startup.sh
STOP_TOMCAT=/usr/local/tomcat7/bin/shutdown.sh

# Source function library.
. /etc/init.d/functions

[ -f $START_TOMCAT ] || exit 0
[ -f $STOP_TOMCAT ] || exit 0

RETVAL=0

umask 077

start() {
        echo -n $"Starting Tomcat Java server: "
        daemon su -c $START_TOMCAT tomcat
        echo
        return $RETVAL
}
stop() {
        echo -n $"Shutting down Tomcat Java server: "
        daemon su -c $STOP_TOMCAT tomcat
        echo
        return $RETVAL
}
restart() {
        stop
        start
}
case "$1" in
  start)
        start
        ;;
  stop)
        stop
        ;;
  restart|reload)
        restart
        ;;
  *)
        echo $"Usage: $0 {start|stop|restart}"
        exit 1
esac
exit $?
 

Change the permission on the tomcat script that we just created.
[root@server ~] # chmod 755 /etc/init.d/tomcat

Add the tomcat to the chkconfig
[root@server ~] # chkconfig --add tomcat

[root@server ~] # chkconfig tomcat on

Test the script by starting, stopping and restarting the tomcat service.
[root@server init.d] # service tomcat start

[root@server ~] # service tomcat stop

[root@server ~] # service tomcat restart

Check for errors in the file /usr/local/apache-tomcat-7/logs/catalina.out
[root@server bin] # cat /usr/local/apache-tomcat7/logs/catalina.out

If you dont have any errors then you can proceed further, or else rectify it first. 

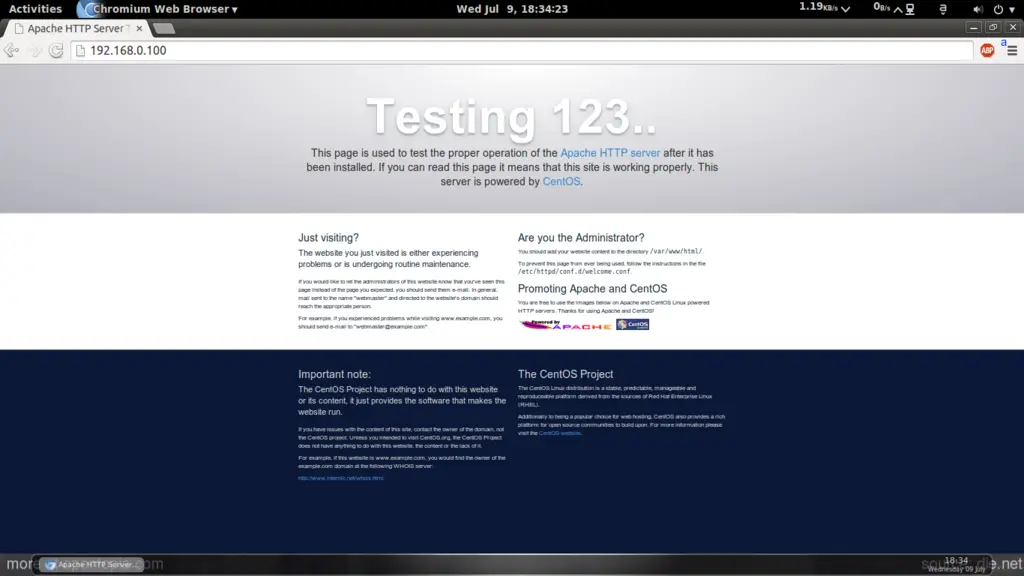
Now open a browser and test the homepage of the tomcat.
[root@server init.d] # firefox http://localhost:8080

Thursday, September 10, 2015

How to Install zPanel on CentOS 6 step by step

This tutorial will guide you to successfully install and setup zPanel CP on Centos 6 VPS. This is basically not normally what I prefer but so many requests ask me to post such tutorial. Well, many of those requests are asking about cPanel/WHM and Kloxo installation but however I prefer zPanel (also called zPanelx). Why? First because it is free and secondly it is more user-friendly. If you’re going to ask me about Kloxo vs zPanel and which is better, so my answer is simple. If you want a free Control Panel for your VPS that is very easy to use and user friendly, then go to zPanel. But if you want more complex and advanced panel, then go to Kloxo because you may be also able to use Nginx with it.

Preparation

This guide is done on a cloud vps running CentOS 6.4 64-bit. This will also work on any CentOS 6 32-bit or 64-bit but for better compatibility make sure you use at least CentOS 6.3.
Also, although zPanel is very lightweight panel in regard of resource usage (compared to cPanel/WHM), but it is strongly recommended to have at least 512MB of RAM if you wish to use -any- control panel with your VPS.

How to Install zPanel CP?

UPDATE: zPanelx v10.1.1 is released. The way how to install it has also changed. Read my new guide on how to install zPanelX CP using its new installer script.
Below is the old one :)
Step 1 – Prepare a fresh CentOS 6 VPS. Log in to your server via SSH (use Putty or Terminal) as root.
Step 2 – Now try to stop Apache and MySQL service (just in case if you have them installed and running already).
1
2
service httpd stop
service mysql stop
in my case I only have Apache running so I stop it:
remove httpd
Step 3 – Then remove Apache and MySQL service:
1
2
yum remove httpd
yum remove mysql
Hit Y to confirm. Screenshot:
remove httpd
Step 4 – Now lets download the installer file:
1
2
3
4
5
# for 64-bit use:
 wget https://github.com/zpanel/zpanelx/releases/download/10.1.0_orig/installer-10-1-0-centos-64.sh.x
# for 32-bit use:
 wget https://github.com/zpanel/zpanelx/releases/download/10.1.0_orig/installer-10-1-0-centos-32.sh.x
Pic:
download zpanel
Step 5 – Now you have to make the installer executable:
1
2
3
4
5
# For CentOS 64-bit:
chmod +x installer-10-1-0-centos-64.sh.x
# For CentOS 32-bit:
chmod +x installer-10-1-0-centos-32.sh.x
pic:
chmod x
Step 6 – Also install required packages:
1
yum install ld-linux.so.2 curl
You may need to type Y twice for confirmation:
install curl
Step 7 – Finally, issue this command to start installing zPanel:
1
2
3
4
5
# for CentOS 64-bit:
./installer-10-1-0-centos-64.sh.x
# for CentOS 32-bit:
./installer-10-1-0-centos-32.sh.x
You have to answer few simple questions. The process should take few minutes, so sit tight and wait till it finishes:
install zpanel
Step 8 – At the end of the process you’ll see all generated passwords displayed, write that down. Also, the process requires restarting your server hence you’ll automatically be logged out from your server.
install done
Step 9 – Now open up your favorite web browser then access your server by typing its ip address. Voila, you’ll now see default zPanel login page. Use zadmin as username and use generated password (step 8 above) to login. Once logged in, you can then change default generated password to something easier to remember but make sure it still uses strong combination.
zpanelx
Step 10 – That’s it. Now you can do some necessary tasks in zPanel control panel area once you logged in. Don’t be worry, all settings inside zPanel are really easy to understood so you’ll be familiar in no time. If you can use cPanel then you should also be able to use zPanel.

NEXT TO DO

  1. Install zPanel on CentOS VPS (you are here)
  2. Install Ajaxplorer File Manager on zPanel CP

F.A.Q

Q: Does zPanel already include Apache, MySQL and PHP?
A: Yes. During installation the installer also installs Apache web server, MYSQL, PHP5 and PHPMyAdmin along with necessary tools like FTP server and mail server.
Q: How much RAM zPanel consumes?
A: Once installed, with all of those services installed and running (Apache, Mysql, PHP, SMTP, IMAP, POP3 and FTP), I got following on my vps:
ram usage
As you can see above, used RAM is about 106MB (still below 128MB) assuming with no traffic (fresh zPanel install).

Wednesday, September 2, 2015

How to Install Apache, PHP And MySQL On CentOS 7 (LAMP)

This tutorial shows how you can install an Apache2 webserver on a CentOS 7.0 server with PHP5 support (mod_php) and MySQL support. LAMP is short for Linux, Apache, MySQL, PHP.

1 Preliminary Note 

In this tutorial, I use the hostname server1.example.com with the IP address 192.168.0.100. These settings might differ for you, so you have to replace them where appropriate.
I will add EPEL-7 repo here to install latest phpMyAdmin as follows:
rpm -ivh http://dl.fedoraproject.org/pub/epel/beta/7/x86_64/epel-release-7-0.2.noarch.rpm

2 Installing MySQL 5 

To install MySQL, we do install mariadb like this: yum -y install mariadb-server mariadb Then we create the system startup links for MySQL (so that MySQL starts automatically whenever the system boots) and start the MySQL server:

systemctl start mariadb.service
systemctl enable mariadb.service

Set passwords for the MySQL root account:
mysql_secure_installation
[root@server1 ~]# mysql_secure_installation
/usr/bin/mysql_secure_installation: line 379: find_mysql_client: command not found

NOTE: RUNNING ALL PARTS OF THIS SCRIPT IS RECOMMENDED FOR ALL MariaDB
      SERVERS IN PRODUCTION USE!  PLEASE READ EACH STEP CAREFULLY!

In order to log into MariaDB to secure it, we'll need the current
password for the root user.  If you've just installed MariaDB, and
you haven't set the root password yet, the password will be blank,
so you should just press enter here.

Enter current password for root (enter for none): <--ENTER
OK, successfully used password, moving on...

Setting the root password ensures that nobody can log into the MariaDB
root user without the proper authorisation.

Set root password? [Y/n]
New password: <--yourmariadbpassword
Re-enter new password: <--yourmariadbpassword
Password updated successfully!
Reloading privilege tables..
 ... Success!


By default, a MariaDB installation has an anonymous user, allowing anyone
to log into MariaDB without having to have a user account created for
them.  This is intended only for testing, and to make the installation
go a bit smoother.  You should remove them before moving into a
production environment.

Remove anonymous users? [Y/n] <--ENTER
 ... Success!

Normally, root should only be allowed to connect from 'localhost'.  This
ensures that someone cannot guess at the root password from the network.

Disallow root login remotely? [Y/n] <--ENTER
 ... Success!

By default, MariaDB comes with a database named 'test' that anyone can
access.  This is also intended only for testing, and should be removed
before moving into a production environment.

Remove test database and access to it? [Y/n] <--ENTER
 - Dropping test database...
 ... Success!
 - Removing privileges on test database...
 ... Success!

Reloading the privilege tables will ensure that all changes made so far
will take effect immediately.

Reload privilege tables now? [Y/n] <--ENTER
 ... Success!

Cleaning up...

All done!  If you've completed all of the above steps, your MariaDB
installation should now be secure.

Thanks for using MariaDB!
[root@server1 ~]#

3 Installing Apache2

CentOS 7.0 ships with apache 2.4. Apache2 is directly available as a CentOS 7.0 package, therefore we can install it like this:
yum -y install httpd
 [root@server1 ~]# yum install httpd
Loaded plugins: fastestmirror, langpacks
Loading mirror speeds from cached hostfile
 * base: ftp.plusline.de
 * extras: mirror.23media.de
 * updates: mirror.23media.de
Package httpd-2.4.6-17.el7.centos.1.x86_64 already installed and latest version
Nothing to do
[root@server1 ~]#
By default apache will be installed, if-not then please install it as shown above
Now configure your system to start Apache at boot time...
systemctl start httpd.service
systemctl enable httpd.service
In CentOS 7.0 uses Firewall-cmd, so I will customize it to allow external access to port 80 (http) and 443 (https).
firewall-cmd --permanent --zone=public --add-service=http
firewall-cmd --permanent --zone=public --add-service=https
firewall-cmd --reload
Now direct your browser to http://192.168.0.100, and you should see the Apache2 placeholder page:

4 Installing PHP5

We can install PHP5 and the Apache PHP5 module as follows:
yum -y install php
We must restart Apache afterwards:
 systemctl restart httpd.service

5 Testing PHP5 / Getting Details About Your PHP5 Installation

The document root of the default website is /var/www/html. We will now create a small PHP file (info.php) in that directory and call it in a browser. The file will display lots of useful details about our PHP installation, such as the installed PHP version.
vi /var/www/html/info.php
<?php
phpinfo();
?>
Now we call that file in a browser (e.g. http://192.168.0.100/info.php):
As you see, PHP5 is working, and it's working through the Apache 2.0 Handler, as shown in the Server API line. If you scroll further down, you will see all modules that are already enabled in PHP5. MySQL is not listed there which means we don't have MySQL support in PHP5 yet.

6 Getting MySQL Support In PHP5

To get MySQL support in PHP, we can install the php-mysql package. It's a good idea to install some other PHP5 modules as well as you might need them for your applications. You can search for available PHP5 modules like this:
yum search php
Pick the ones you need and install them like this:
yum -y install php-mysql
In the next step I will install some common PHP modules that are required by CMS Systems like Wordpress, Joomla and Drupal:
yum -y install php-gd php-ldap php-odbc php-pear php-xml php-xmlrpc php-mbstring php-snmp php-soap curl curl-devel
Now restart Apache2:
 systemctl restart httpd.service
Now reload http://192.168.0.100/info.php in your browser and scroll down to the modules section again. You should now find lots of new modules like curl etc there.:

7 phpMyAdmin installation

phpMyAdmin is a web interface through which you can manage your MySQL databases.
phpMyAdmin can now be installed as follows:
yum install phpMyAdmin
Now we configure phpMyAdmin. We change the Apache configuration so that phpMyAdmin allows connections not just from localhost (by commenting out the <Directory "/usr/share/phpmyadmin"> stanza):
vi /etc/httpd/conf.d/phpMyAdmin.conf
[...]
Alias /phpMyAdmin /usr/share/phpMyAdmin
Alias /phpmyadmin /usr/share/phpMyAdmin

#<Directory /usr/share/phpMyAdmin/>
#   <IfModule mod_authz_core.c>
#     # Apache 2.4
#     <RequireAny>
#       Require ip 127.0.0.1
#       Require ip ::1
#     </RequireAny>
#   </IfModule>
#   <IfModule !mod_authz_core.c>
#     # Apache 2.2
#     Order Deny,Allow
#     Deny from All
#     Allow from 127.0.0.1
#     Allow from ::1
#   </IfModule>
#</Directory>


<Directory /usr/share/phpMyAdmin/>
        Options none
        AllowOverride Limit
        Require all granted
</Directory>

[...] 
Next we change the authentication in phpMyAdmin from cookie to http:
vi /etc/phpMyAdmin/config.inc.php
[...]
$cfg['Servers'][$i]['auth_type']     = 'http';    // Authentication method (config, http or cookie based)?
[...]
Restart Apache:
systemctl restart  httpd.service
Afterwards, you can access phpMyAdmin under http://192.168.0.100/phpmyadmin/:

Tuesday, September 1, 2015

How to Configure Samba in Centos 6 step by step


Installing Samba

1.    Use yum to install the Samba package:
        yum -y install samba
 
Creating Samba Test Directory and Files
For this part of the procedure, you'll use the su - (switch user) command to work as root. Although it’s not best practice to do this regularly, there are times where it's much more practical to work directly as root instead of trying to use sudo to do everything. This is one of those times.
You're going to create a new directory containing three empty files which you'll share using Samba.

2.    While logged on as root, create the new directory /smbdemo with the following command:
       mkdir /smbdemo
3.    Change the permissions on the new directory to 770 with the following command:
       chmod 770 /smbdemo
4.    Navigate to the new directory with the following command:
       cd /smbdemo
5.    Add three empty files to the directory with the following command:
        touch file1 file2 file3

Figure 1: Using touch to create files for the Samba exercise.
Adding the Samba User
You must add users to the Samba database in order for them to have access to their home directory and other Samba shares.
6.    Use the following command to add a new Samba user (the new Samba user must be an existing Linux user or the command will fail):
       smbpasswd -a <username>
        For example, to add the user don, use the command smbpasswd -a don.
Creating the Samba Group
7.    Perform the following steps to create a smbusers group, change ownership of the /smbdemo directory, and add a user to the smbusers group:
        groupadd smbusers
        chown :smbusers /smbdemo
        usermod -G smbusers don


Figure 2: Adding the smbusers group, changing ownership on /smbdemo, and adding a user to the smbusers group.

Configuring Samba

Note: In several of the steps in this exercise, I mention specific line numbers. The line numbers I mention are based on CentOS version 6.5. If you’re running any other version, your line numbers may be different. In that case, just search for the relevant text string.
Samba configuration is done in the file /etc/samba/smb.conf. There are two parts to /etc/samba/smb.conf:
  • Global Settings: This is where you configure the server. You’ll find things like authentication method, listening ports, interfaces, workgroup names, server names, log file settings, and similar parameters.
  • Share Definitions: This is where you configure each of the shares for the users. By default, there’s a printer share already configured.
Configuring smb.conf
8.    In the Global Settings section, at line 74, change the workgroup name to your workgroup name. I’m going to use soundtraining as a means of shamelessly promoting my company during your quest for knowledge. I’m sure you understand.
soundthinking point: Enable Line Numbering in vimYou can enable line numbering in vim with the command :set nu. If you want to turn it off, use :set nu!.

Figure 3: Changing the workgroup in the Samba configuration file.
9.    Now, confirm that the authentication type is set to user by going to the authentication section, still in Global Settings, and line 101. Make sure there is no hash mark at the beginning of the line to enable user security.

Figure 4: Confirming user authentication in the Samba configuration file.
This change allows users on your Red Hat/CentOS server to log in to shares on the Samba server.
10.    Next, add a section for /smbdemo, which you created earlier. You can just add it to the very bottom of /etc/samba/smb.conf with the following lines:

Figure 5: Configuring Samba share definitions.
11.    Be sure to save your changes with a :wq.
You can use the command testparm to test the configuration. In order for the server to re-read the configuration file and make the changes, you must restart the Samba service with the commands service smb restart and service nmb restart.
When properly configured, you should be able to connect from a computer running the Windows operating system and see both the general share and the user’s home directory:

Figure 6: Viewing Samba shares from a Windows computer.
You can test it by opening the user’s home directory in Windows, adding a file, and then viewing that file on the Linux server.

Troubleshooting Samba

In addition to checking for spelling and typographical errors, check to ensure the Linux firewall is permitting Samba traffic. Similarly, if you're using SELinux on your system, you must explicitly permit Samba traffic, and finally you must enable Network Discovery on the Windows client machine.

Sunday, August 30, 2015

How to Get Removed IP from Blacklists ?

There are tens and hundreds of blacklists that help to fight spam. Using one or more blacklists for filtering incoming emails can eliminate up to 99 % of spam. However, no blacklisting system is perfect and hence from time to time it might happen that a good address is blacklisted too. And there are more scenarios in which it makes sense to allow blacklisted addresses to be removed from the list. For example, a server hosting company might have a poor client who sends spam and recognizes that using a blacklist monitoring service. The hosting closes the client’s account. What is left is an IP address that belongs to the hosting company and it is blacklisted. This is when blacklist removal needs to be done, so that the IP can be cleaned and assigned to a new client. 

General Instructions
If your IP address is blacklisted on one or more blacklists, you should note that blacklists are managed by different owners. There is no central entity that you can contact and ask for removal from all blacklists. We at Online Domain Tools do not maintain any of the blacklists and it is thus pointless to contact us with removal requests. Here is how to proceed when you are blacklisted and want to be removed, assuming you are listed on a blacklist named xyz.domain.com:

  •   Many DNS-based blacklists not only provide information that a certain address is listed (via a valid A DNS record), but they also provide additional details in a TXT DNS record. Good blacklist checkers provide this information to the end user. This is the primary source of links where the user can get more information about the listing and instructions on how to ask for removal. Not all blacklists work like this, however. Some blacklists do provide additional information, but they do not provide any link. And there are also blacklists that do not provide TXT records at all.  
  •  If there was no additional information provided by the blacklist itself, you can try to search for this info using your favorite search engine. Search for xyz.domain.com in the search engine. If there are no relevant results, search for domain.com blacklist, domain.com dnsbl, or domain.com rbl. If nothing helped, try to directly access http://xyz.domain.com/ and http://domain.com/ to see if there is a web page. For most of the blacklists, this should be enough to locate a web page with instructions on how to get removed.
  • If still nothing helped, you are listed on one of the blacklists that does not have a web page. Try to use Whois and enter domain.com to get contact information to the owner of the domain. Try to contact them and ask for removal.
  • Note that some lists operates fully automatically and do not accept removal requests. In case of these blacklists, the listed IP address will be removed automatically, once a certain period of time elapses. Obviously, this requires that the IP address no longer expresses the behavior because of which it became listed in the first place.
List of Removal Links for Active Blacklists
We have done the work for you for most of the active DNSBL and RBL blacklists out there. Here are their information and removal links:
Blacklist
Info/Removal Link
0spam.fusionzero.com
access.redhawk.org
all.rbl.jp
all.s5h.net
all.spamrats.com
aspews.ext.sorbs.net
b.barracudacentral.org
backscatter.spameatingmonkey.net
bb.barracudacentral.org
bl.blocklist.de
bl.drmx.org
bl.emailbasura.org
bl.konstant.no
bl.mailspike.net
bl.mav.com.br
bl.nosolicitado.org
bl.nszones.com
bl.scientificspam.net
bl.score.senderscore.com
bl.suomispam.net
bl.spamcannibal.org
bl.spamcop.net
bl.spameatingmonkey.net
bl.spamstinks.com
blacklist.woody.ch
block.dnsbl.sorbs.net
bsb.empty.us
bsb.spamlookup.net
cbl.abuseat.org
cbl.anti-spam.org.cn
cblless.anti-spam.org.cn
cblplus.anti-spam.org.cn
cdl.anti-spam.org.cn
cidr.bl.mcafee.com
combined.rbl.msrbl.net
db.wpbl.info
dnsbl-1.uceprotect.net
dnsbl-2.uceprotect.net
dnsbl-3.uceprotect.net
dnsbl.anticaptcha.net
dnsbl.aspnet.hu
dnsbl.burnt-tech.com
dnsbl.cobion.com
dnsbl.dronebl.org
dnsbl.inps.de
dnsbl.justspam.org
dnsbl.kempt.net
dnsbl.net.ua
dnsbl.proxybl.org
dnsbl.rv-soft.info
dnsbl.rymsho.ru
dnsbl.sorbs.net
dnsbl.spam-champuru.livedoor.com
dnsbl.tornevall.org
dnsbl.webequipped.com
dnsbl.zapbl.net
dnsblchile.org
dnsrbl.swinog.ch
dul.dnsbl.sorbs.net
dul.pacifier.net
dul.ru
dyn.nszones.com
dyna.spamrats.com
escalations.dnsbl.sorbs.net
exitnodes.tor.dnsbl.sectoor.de
fnrbl.fast.net
forbidden.icm.edu.pl
free.v4bl.org
hostkarma.junkemailfilter.com
http.dnsbl.sorbs.net
images.rbl.msrbl.net
intercept.datapacket.net
ip.v4bl.org
ipbl.mailhosts.org
ipbl.zeustracker.abuse.ch
ips.backscatterer.org
ix.dnsbl.manitu.net
korea.services.net
l1.bbfh.ext.sorbs.net
l2.apews.org
l2.bbfh.ext.sorbs.net
l3.bbfh.ext.sorbs.net
l4.bbfh.ext.sorbs.net
list.bbfh.org
list.blogspambl.com
list.quorum.to
lookup.dnsbl.iip.lu
mail-abuse.blacklist.jippg.org
misc.dnsbl.sorbs.net
multi.surbl.org
netbl.spameatingmonkey.net
netblockbl.spamgrouper.com
netscan.rbl.blockedservers.com
new.spam.dnsbl.sorbs.net
noptr.spamrats.com
old.spam.dnsbl.sorbs.net
pbl.spamhaus.org
phishing.rbl.msrbl.net
pofon.foobar.hu
problems.dnsbl.sorbs.net
projecthoneypot.org
proxies.dnsbl.sorbs.net
psbl.surriel.com
rbl.abuse.ro
rbl.blockedservers.com
rbl.dns-servicios.com
rbl.efnet.org
rbl.efnetrbl.org
rbl.interserver.net
rbl.iprange.net
rbl.megarbl.net
rbl.polarcomm.net
rbl.rbldns.ru
rbl.talkactive.net
rbl2.triumf.ca
recent.spam.dnsbl.sorbs.net
relays.bl.kundenserver.de
relays.dnsbl.sorbs.net
rep.mailspike.net
safe.dnsbl.sorbs.net
sbl.nszones.com
sbl.spamhaus.org
short.rbl.jp
shortlist.mailhosts.org
singlebl.spamgrouper.com
smtp.dnsbl.sorbs.net
socks.dnsbl.sorbs.net
spam.dnsbl.anonmails.de
spam.dnsbl.sorbs.net
spam.pedantic.org
spam.rbl.blockedservers.com
spam.rbl.msrbl.net
spam.spamrats.com
spamguard.leadmon.net
spamlist.or.kr
spamrbl.imp.ch
spamsources.fabel.dk
srn.surgate.net
st.technovision.dk
tor.dnsbl.sectoor.de
torexit.dan.me.uk
truncate.gbudb.net
ubl.unsubscore.com
virbl.dnsbl.bit.nl
virus.rbl.jp
virus.rbl.msrbl.net
vote.drbl.caravan.ru
vote.drbl.gremlin.ru
web.dnsbl.sorbs.net
web.rbl.msrbl.net
work.drbl.caravan.ru
work.drbl.gremlin.ru
wormrbl.imp.ch
xbl.spamhaus.org
z.mailspike.net
zen.spamhaus.org
zombie.dnsbl.sorbs.net